Showing posts with label Wild At Heart. Show all posts

Saturday, 30 June 2018

CVS | See You Later

Good Morning my scrappy friends,
Sadly, today is the day I say farewell to my CVS Family for a little bit. Things have gotten hectic here on my end with family, work and life in general. Today, school is officially out for summer and it's a busy time of year for everyone. Unfortunately, scrapbooking is the first thing to get pushed aside for the time being until things settle down and go back to "normal".


But, on a happier note, I'm sharing my top three favourite layout's I've created while on the wonderful Cocoa Vanilla Studio Design Team. So, let's get right into it...

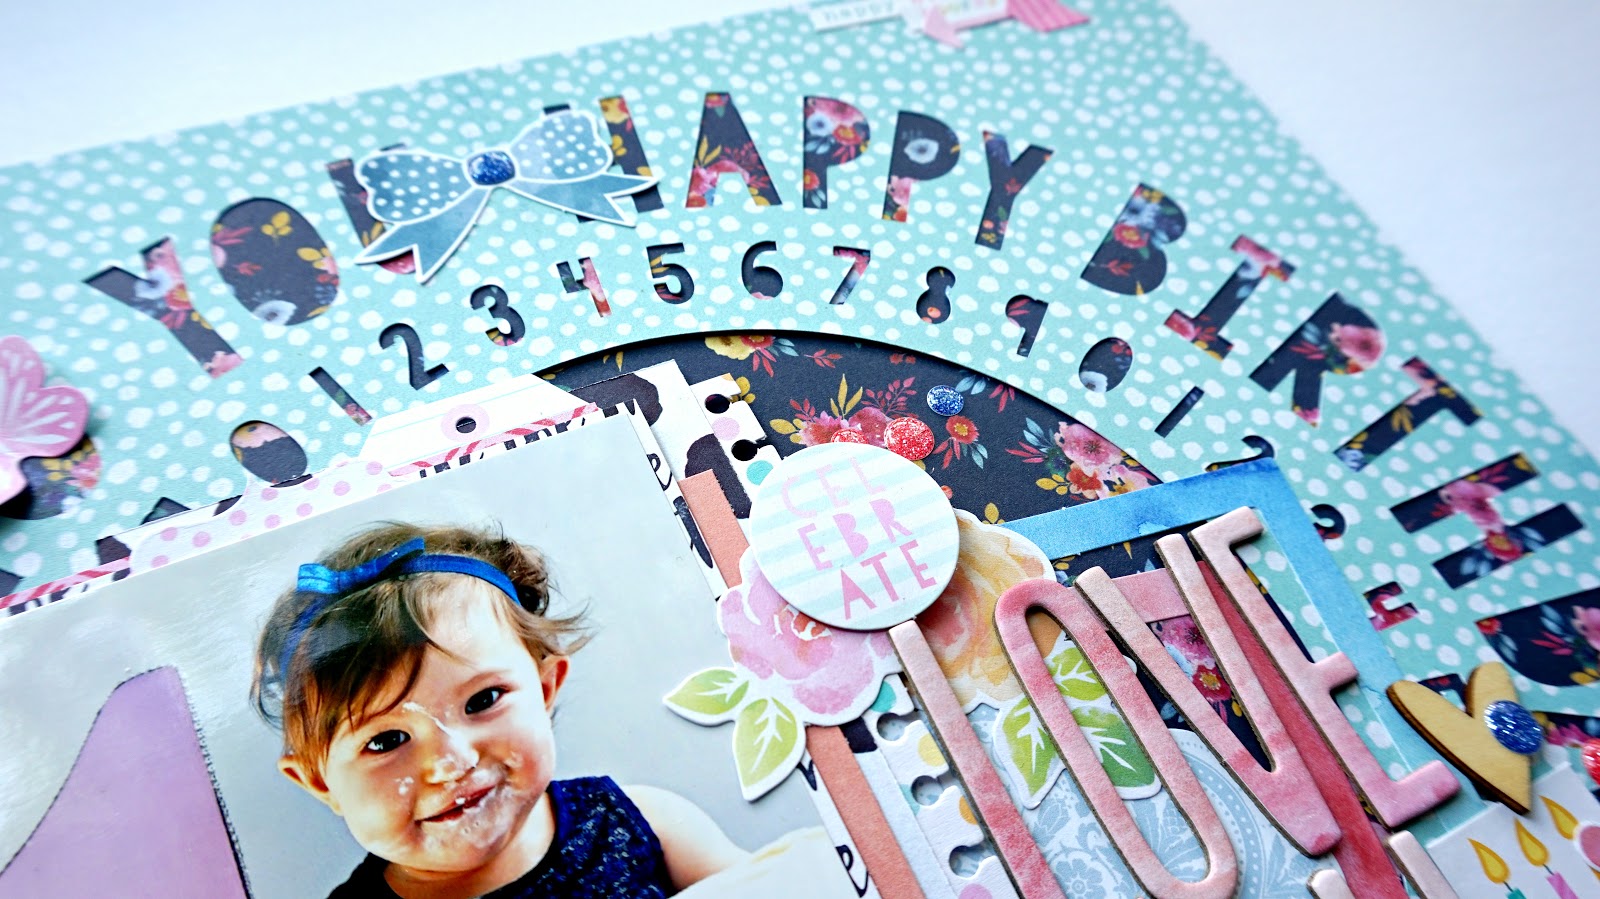
In no particular order of course, here's the first one created with the More Than Words collection.


This one is one of my top favourites for a few reasons. I love the composition of the background papers, the title and the colour scheme. To me, it's visually pleasing and has a certain playfulness to it.


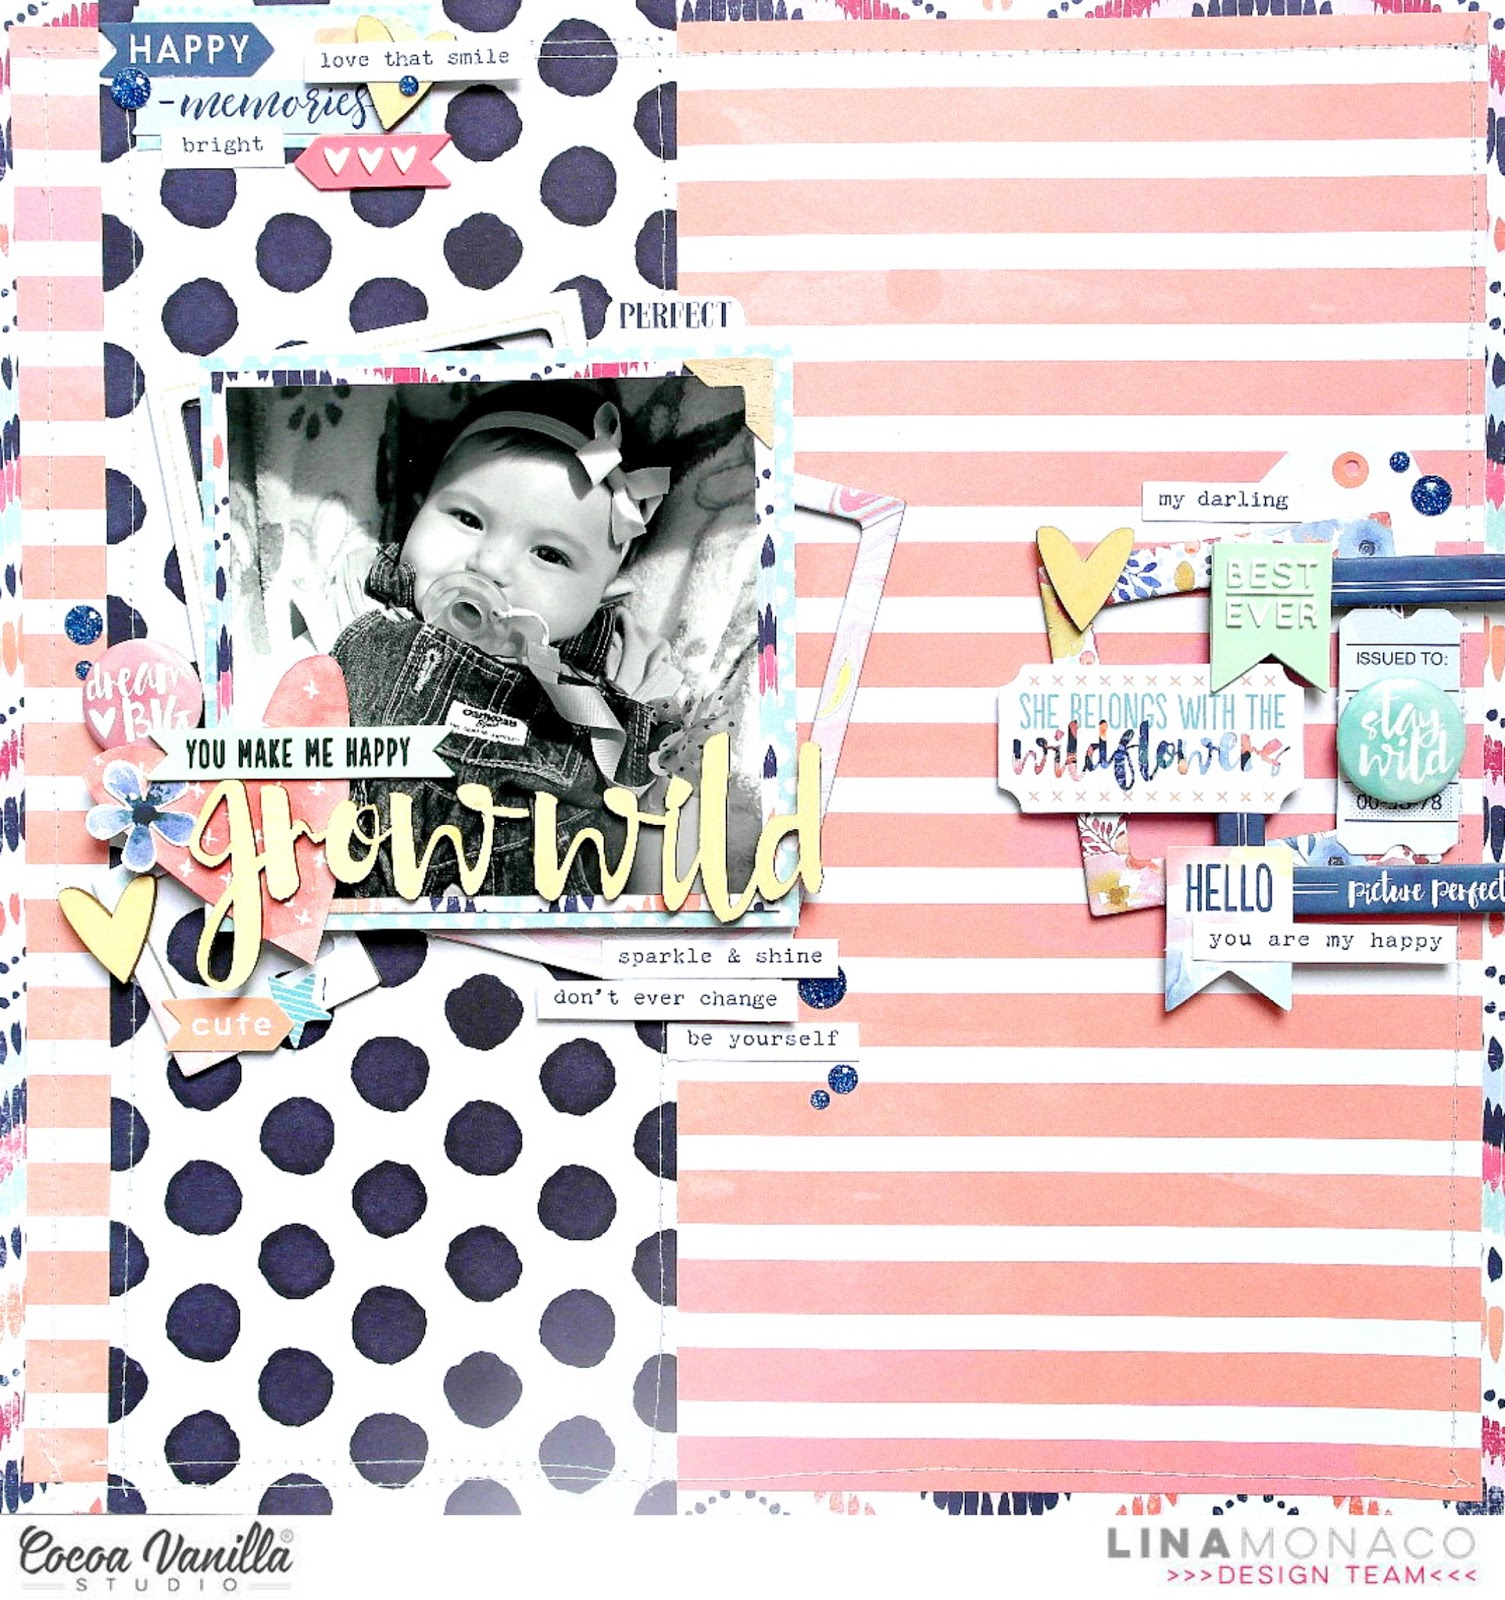
This one probably for some of the same reasons, the background. I may have a bit of a "thing" with backgrounds :P
The chipboard frames in the Wild At Heart collection have my heart. They are so well designed and easy to use. I could just stick them anywhere! Plus the vibrant and rich colours... ❤


Hard to choose just three but this one...


This one is created with the Wild At Heart collection as well. But, in comparison to the last one of my faves, it looks completely different in colour scheme. It's not as dramatic as the first but I just adore the composition of the Chipboard Frames in this one! The photo was easy to nestle into the frame and looks great! Also, all the cute Die Cut Ephemera... I mean who doesn't love bows, hearts and florals? Oh! And the Wood Veneer title! Swoon!

Thank you so much for joining me throughout my journey here with CVS. I'm sad to go but hoping to hop back on when things settle down a bit for me. I'm such a HUGE fan of Zoe's work and am happy to represent her and her company.

Have a great day!
Big Hugs,
xoLina


Tuesday, 19 December 2017

CVS | My Favourites

Hi Everyone!
Welcome to the blog today! Today, I'm sharing my top two favourites over the past year, I've created with Cocoa Vanilla Studio.
During this holiday season, we're reflecting on the layouts we've created over the year with the team and choosing our favourites! I must say, this was fun as it's something different for all of us. But, I must admit, it was difficult to narrow it down to just a couple but I managed to choose these two. Thanks for stopping by!


This one! LOL! This layout of my little one featured the Wild at Heart collection in all it's chipboard frame glory. You all know how much I adore the chipboard frames. The papers used for this layout, were also my faves. I mean how can anyone resist colourful florals, navy and white vellum and woodgrain? The answer... No one! Also, the tiny words from the Accessory Sticker sheet put this one on the top of my list. They just added the right sentiment I was trying to convey without having to journal. I'm not always a fan of my writing on layouts so this was a perfect addition!


Second Fave! Now if this one doesn't make you melt, I don't know what will! LOL! This one as well was created with the gorgeous Wild at Heart collection. As you can tell, I was smitten with this collection this year. Just LOVE!
This one layout gets me every time! I think it's because of all the layers of goodness. The composition of this layout I created is within my top 5 layouts. It's fun and whimsical in style! The title created out of Wood Veneer words makes me happy! It's the perfect compliment to the Chipboard Frames, tiny words from the Sticker Accessory Sheet and Die Cut Ephemera. I feel like the ephemera peeking out from behind the frames is similar to a burst of sunshine :)

I know that this post has brought a smile to your face because it surely made me happy looking back through photos and reminiscing through older posts. Wishing you all a Merry Christmas and a spectacular holiday season!

 With love and adoration,
Lina 💜

Friday, 6 October 2017

CVS | Love You

Happy Friday Scrappy Family!
Hope you've had a wonderful week!

Today, I'm sharing a layout I created of my little one, face full of ice cream 💛 But, seriously, how could I not snap and scrap a picture. She'll thank me when she's older. LOL!
I used the gorgeous Wild at Heart collection for my layout this week and I'm still wild about it!


Starting off this layout, I knew I wanted to stagger my background papers and create an offset layering effect. So I chose my papers and arranged them in the order you see. I used the Luscious paper as my base, then layered the vellum sheet, Artisan and then finally white card stock to get the look I was offer. I just love this effect!

I matted my photo with some of the papers in the collection including the navy floral vellum and popped it up with some foam sheet for dimension.

Next, I went through the chipboard frames (my fave) and choose 3 that I thought worked best with the colour scheme I was working with. I chose a floral and different sized navy blue ones. I placed the floral and the larger navy frames to the left of the photo and the smaller one to the right. Now I have a visual triangle to work with.


Now, my favourite part... embellishing! I went through the Die Cute Ephemera, Chipboard Stickers and the Accessory Stickers and chose pieces to accent my layout and photo. I kept the embellishing relatively simple this time around. Kinda...😛


From the Wood Veneer package, I chose two words, Love and You and used them for my title. But before adhering them down, I misted them with firstly some White Dylusions Ink Spray, dried it and later added some HSCS in Peacock. After drying, the wood veneers have a great over all texture and colour. They kinda remind me of a galaxy colouring. Navy with specks of white peeking through and sparkle... lots of sparkle. Just look at 'em! 💙


To finish up my embellishing, I used a Flair Button that reads Hello. Before adhering it down, I took some metallic silver thread and just created a simple nest for the flair to sit on. I love the texture it adds to the clusters.

Lastly, I took the Enamel Dots in the lighter Blue and scattered them around my page. Placing them just peeking out from other pieces and some to add direction.
I hope you enjoyed my layout share for the week as much as I adored creating it. Have a wonderful weekend!
xoLina

Wednesday, 20 September 2017

CVS | Happy Birthday

Good Morning Crafty Family!
Welcome to the blog today, Lina here! Hi!
Today I'm sharing a layout I created with the always beautiful Wild at Heart & Make a Wish collections. Yes, I mixed them! They work perfectly together and I love how each are so different but compliment the other so well.
The theme this week in the blog is to use florals and hearts... literally, a piece of cake! LOL!
The photo I chose to scrapbook is of my youngest daughter, on her first birthday. 🎂
Here's my layout...


I started with a cut file from Paper Issues, it's free in their shop and cut it from the aqua Double Dot paper. I then backed it with the navy floral sheet. I just love this pairing! The navy floral really pops behind the aqua dots and it's the first element crossed off the list in this week's theme. Easy!
I began with the matting of my photo using patterns from the collection that I thought worked well with my over all theme. Then, I popped it up onto dimensional foam for added height.


Next, I shopped the Die Cut Ephemera package, my favourite part! I used the ephemera from the Make a Wish collection. I used some very beautiful florals, bunting and pennant banners, words and frames.


Creating a sub title, I used the Love You from the Chipboard Sticker Sheet. The colours were perfect to add here. It gave the layout something with it being a loud and bold title. Next, I also added some very colourful tiny words from the Make a Wish collection. I mean, they were perfect to use here, the sentiments were exact! 


For the "hearts" element, I used hearts from the Wood Veneer package. I left them in their natural state since their colour is so pretty... light and airy. This checked off number 2 of the theme's focus. I added a few other smaller clusters in and around my page. This by no means is a simple or minimalistic layout to be honest, but I love how it came together.

 
This is a good view of how much is actually on this page... All the pattern, colours and embellishment make my papercrafting heart happy! 
Lastly, to add that last little bit of something, I sprinkled around the remaining bit of Sparkle Enamel Dots I had in the navy blue. They are sparkly and pretty and I couldn't resist. I tucked them under elements and around my page. I really love the effect!


Thank you for stopping by today, I'm glad you're here! Hope you enjoyed my layout 💜
Have a wonderful day!


xoLina

Thursday, 6 July 2017

CVS | For I Know...

Good Morning Scrappy Fam!

Today, I'm sharing with you a layout I created using the ever gorgeous Wild at Heart collection. Gah, I don't think I'll ever get sick of this collection. I just keep finding inspiring ways to use it.

This week on the blog, we're focusing on journaling. Those who follow my YouTube channel know I rarely journal on my layouts. If I have something important to say or document, I write it on the back. I'm always afraid that if I do it on the front, I won't end up liking my writing and then won't love the overall look of my layout. Silly right? LOL!

But, I feel like I've found a creative solution... Hidden journaling, best of both worlds! Here's my layout:


Firstly, I chose this background paper, Artisan, knowing I wanted to cut out a huge title with my Silhouette Cameo and secondly, back it with another sheet from the collection. In this case, I choose that bold floral, Memento. Perfect combo! The cut file is something I found online. You can easily search it if you need to.


The matting of my photo was up next... This is one of the most fun (and important) for me when creating my layouts. I chose papers that would compliment my photo and layout but would not compete with it. I also used my layers as a way to bring in the additional colours of the collection such as the navy, to the top of my layout.

Also, I chose to scrapbook this photo in black and white instead of the colour version. I have two reasons for this; First, I didn't want the colours of the photo to get lost or blend with the colours of the papers. And, secondly, the black and white picture was a bit more dramatic ;)

My matting is also where I was going to "hide" my journaling. I used foam sheet pieces to create a slot where my tags would be housed. The tags are where I wrote my journaling and are aesthetically part of my layers. I added some baker's twine to my tags as well.


Next up... embellishing! I feel like I used some of everything here for my clusters: Die Cut Ephemera, Chipboard Frames, the tiny words from the Accessory Stickers, a piece from the Rubber Charms set, a Flair button that I surrounded with pink thread and finally, a healthy sprinkling of the Enamel Dots. I used the blue sparkle ones :)


I created a heavily embellished cluster on either side of my photo and then a smaller and simpler one at the top right hand corner of my photo. Seriously, I just love the tiny phrases and words that are included on the Accessory Stickers sheet. I could add those everywhere. And, theres always the right message to add.


I appreciate you stopping by today and letting me share this layout with you! Have a beautiful day!
xoLina

Saturday, 6 May 2017

CVS | Sweet You

Hello Gorgeous People!
This morning, I'd like to share with you a layout I recently created using the Wild at Heart collection. I am having a wonderful time using it and creating wonderful layouts with it. I'm still totally in love with it!
The photo I decided to scrapbook is one of my dear hubby and our littlest meatball, who just turned one. I thought that the colour of their outfits fit well with the navy of the collection. They matched perfectly!

I also have a process video recorded for this layout which you can find below. Hope you'll watch!


I began with a white sheet of card stock that I cut down a bit. I took about 2.5 inches off of one side and mounted it onto the gorgeous navy floral you see strips of at the top and bottom of the layout. 
Then I went in with some mixed media and applied the ever popular, "packaging technique". I used three different colours of ink to achieve the golden yellow colour. It picks up perfectly the golden tones in the floral sheet. I then took another ink spray in gold and splattered some paint around my page. 


Next, I mounted my photo with patterned papers from the collection. I just used smaller pieces and staggered them behind my picture in kind of a hap-hazard manner, showing just bits of each of the patterns used. The entire piece, photo with matting is all popped up on a piece of foam sheet, creating dimension.


For my title, I eagerly reached for the Wood Veneer Words. I just love the texture the wood gives to any layout. I choose the words Sweet and You, creating Sweet You 😊  C'mon, look at those faces... the title was fitting. I may be a bit biased.  LOL!
Next, to start my embellishing, I started with the Die Cut Ephemera and sorted through them, choosing the one's I thought would compliment my layout best. I also fussy cut some larger florals from one of the patterned papers. I purposely left a navy border around the images to create contrast against my white card stock paper. Working on my visual triangle, I added clusters of embellishments to both sides of the photo plus the top left corner. I also added pieces from the Rubber Charms and a Flair Button that reads, "You make my heart sing". Perfect!

Still working on embellishing, I added some of the Chipboard Stickers to round it all off. The clusters are full (just as I like them 😛) but not over done.


Lastly, the most wonderful finishing touch to any layout... Sparkle Enamel Dots in the gorgeous amber colour. I sprinkled and tucked them in and around my layout and peeking under the embellishment clusters. I used the entire bit of them! I couldn't get enough!


Thank you for stopping by today and sharing in my layout.

Have a wonderfully creative day! xoLina


Thursday, 6 April 2017

CVS | Grow Wild

Good Day Everyone! I'm so glad you could join me today in sharing this layout I created with the ever gorgeous Wild At Heart collection. I have decided to scrapbook and document a photo of my youngest daughter from last summer, it's amazing how quickly they grow! Both my girls are growing faster than I can create scrapbook pages of them! I'm sure you mom's know exactly what I'm talking about!

Jumping in, starting my layout, I knew I wanted to use the gorgeous coral stripe in the collection called Fussy Cuts. I've been eyeing it since I got the collection and saving it for the right picture to scrap. Going in, I also knew I wanted to "frame" out the sheet so I chose the lovely Bohemian sheet to do that. I cut out the middle and put it aside to use as not to waste any of this incredibly gorgeous collection. Behind the Bohemian sheet, there is a lovely navy on white polka dot. I cut a strip and placed it on the left hand side of my background sheet, running vertically.


After adhering everything down with tape runner, I took it all to my sewing machine and stitching using white thread along the entire perimeter of my layout. I also stitched around the polka dot strip to it all looked cohesive.
For my photo, I knew I wanted to matte it with that gorgeous aqua dot paper, but also wanted to keep it all simple. 

I chose a couple papers that I thought would compliment the idea I had in my head for the overall look of the layout.


For dimension and added depth, I added some of the chipboard frames behind my photo and off set them a bit. I really like the look of how they're placed.

Embellishing this layout was easy... I just used all the things! I mean, how could I not? LOL! I used the Ephemera pack, Rubber Charms, Button Flair and the Wood Veneer for my title. I thought the "grow wild" was a perfect title for this photo and layout. Especially considering how I mentioned how quickly they grow, literally like weeds!
I also adorned the page with little accents from the Enamel Dots. They're the perfect amount of sparkle for the page. I used them in the darkest blue in the package, it just matched all the navy perfectly!


I then thought it would be a cool idea to add some frames to the right right of my layout, coming right off the page, to create some balance. I added two chipboard frames along with some ephemera and some tiny word phrases to complete this side of the page.

I also wanted to create a third cluster to create a visual triangle. to I created a tiny one at the top left of my page, just above my photo. I think it added the final bit of something my layout needed. Plus, let's be honest, it gave me another opportunity to add more embellishments to my page. :P

I hope you enjoyed my layout share today as I totally enjoyed creating this. This line is incredible in the way it's created. I don't think I'll ever bore of it! Head over to the shop now and have a looksee for yourself! 💜  Thanks for stopping by! xoLina

Monday, 20 March 2017

CVS | Hello Beautiful

Good Morning Lovelies!
So excited and happy to share with you a wonderful layout of my mamma I created using the stunning Wild at Heart collection. It's still my fave collection of all time and I plan on using it until it's not in production anymore! 😛 It's truly a gorgeously, stunning assortment that's not only beautiful to look at but very versatile in use.
Like I mentioned above, this photo is of my dear mamma and was taken earlier this year at my sister's bridal shower. After I took it, and looked at it in my camera roll, I knew it was one of those photos that needed to be documented and not just sit on my computer. So here's how I got started...


I began with the gorgeous Double Dot paper. It's a beautiful light aqua blue sheet with random white dots on it. The back is just as fun, a white background covered in fun, colourful dots. It's so festive and celebratory in style. I knew I wanted to use some spray mists to add some "mixed media" to my background. I used a darker, denim blue and a more turquoise-y colour and used the packaging technique. I let that air dry for a few minutes and worked on the rest of my layout.
I matted my photo with a few of the other papers in the collection including Fussy Cuts and Bohemian and then added some dimension to my photo with some foam sheet that I cut down. I just adore the lift it gives any layout.


I decided the embellishing was my next step. I sorted through the die cut ephemera and chose a few that would co-ordinate with my photo and background. I placed them around my photo, creating two clusters, one on the top left and the other on the bottom left of the photo. I also embellished with the Rubber Charms, Flair Buttons, and the Enamel Dots in the darkest sparkly blue. The Accessory Stickers were the last thing I added to complete my embellishing. They just add that perfect little something!


For my title, I knew exactly what it would be after looking at the Chipboard Stickers. It was the amazing "Hello Beautiful" words from the set. They screamed at me and were the perfect colour and size for my layout! Without hesitation, I added them and then continued to embellish the title with a few floral die cuts, an xoxo and a coral rubber charm. This created my third and final cluster and a visual triangle.
I also knew that the butterflies in this collection would compliment my layout and draw the eye to strategic areas wherever they were placed. So I sprinkled with love <3
Lastly, and to finish my layout, I used some gold spray mist and added some splatters in the places where I had already placed my clusters.


Thank you so much for stopping by today and reading. I hope you enjoyed my layout today and will be back again soon! 💜

Tuesday, 14 March 2017

CVS | Happy Heart

Hello Friends! I'm so glad you're here!
Today, I'd like to share a layout I created with the fabulously created, Wild At Heart collection. It's the first layout I have created with it and let me just tell you... It's incredible! 

I'm smitten by the entire collection, all of it!
The photo I decided to scrapbook is of my younger daughter, Juliana. She's such a happy, smiley baby and this photo captures her bubbly personality perfectly!
Before I even chose my photo to scrapbook, I knew I wanted to use this gorgeous coral ombre paper called Luscious. What an absolutely perfect name of this divine sheet of paper. I also used strips of paper from Memento and Artisan. I adhered the strips down with just a bit of tape and then sewed them onto my layout with my small sewing machine and white thread.
I must note that I felt that I needed to use a black and white photo for my layout. I just adore all the colours of the line and wanted the colours to speak volumes about my layout. I feel I've accomplished that in doing this.


The focus this week at CVS, was Chipboard accents and frames and I knew I wanted to showcase this photo with all the frames available in this collection. I decided on a large floral frame to actually frame my sweet photo. And then I went to work on my foundation or base of my layout. I took my favourite frames and built the bottom of my layers. I also chose smaller frames that would accentuate and compliment the shape of my layout. For the smaller slide looking frames, I used some of the pattern paper from the collection to back them and add another pop of colour and dimension to my embellishments.


I loved all the ephemera die cuts in this collection but made sure to choose just my favourites. I seriously could have used them all on this one single layout. I liked the addition of the floral pieces in the top left corner of the photograph. I feel it add a bit of balance and femininity to the harder lines of the frames. The doily tucked into the background frames helps with that as well. It's a good contrast to one another.


For my title, I knew I wanted to use the Wood Veneer as the entire title. I chose 2 words, Happy and Heart. So, my title is Happy Heart. I just adore this wood veneer, it's just the right shade of wood and super thin. It's perfect! I also placed some wood veneer hearts around my layout, tucked into clusters for visual interest and to tie that same wood colour in other aspects of my layout.


You can see all the great lift and dimension I get by layering those chipboard frames. I just love it! To embellish, I used many pieces from the Ephemera Die Cut pack, Chipboard Stickers and the Accessory Stickers. I just adore the tiny word stickers included on the Accessory Stickers sheet. I chose my favourites and adorned my page with them. The pop of white from the word stickers makes the other colours really pop and stand out off the page.


Finally, finishing off my layout, I picked a Flair Button that worked well with my layout and for me, it was this one that says Hello. It added the perfect colours right where I needed them to. The last things I did, was add some gold splatter with some gold mist and that was it! Voila, done!

Thank you so much for stopping by today!

Thursday, 9 February 2017

CVS | Wild At Heart Unboxing

Hey Friends!
Hope you're all well! I'd like to share with you today my Design Team package from Cocoa Vanilla Studio featuring the ever beautiful, Wild At Heart collection. It's a stunning collection full of gorgeous ephemera, accent stickers, labels, rubber charms and chipboard frames. Every pieces was meticulously designed and put together. I'm in LOVE!

I cannot wait to begin designing with this collection, all of it!
Thanks for watching!


Look how gorgeously packaged it comes! I love the details!