Showing posts with label process video. Show all posts

Tuesday, 6 March 2018

CVS | Sweet Moments

Good Morning Scrappy Friends!
Lina here with you today sharing a layout I created using my fave, the More than Words collection from Cocoa Vanilla Studio. I am scrapbooking a photo of my eldest daughter, Alessandra taken the other day at school when the parents were invited to class to share in a poetry recital. My girl was so happy to see both mom and dad in the audience and I snapped this quick photo of her. And as the title states... a sweet moment. Here's what I created...


I began with the background sheet called Radiant a cut the word "moments" using a simple, uppercase font. Then, I used my watercolour paints to create a soft and beautiful watercolour wash. I used tones of peachy pink and a blueish aqua. I took inspiration for both the colours from the in the collection. I then backed the cut word with a sheet from the 6x6 paper pad. That black and white floral gets me every time. ❤


I then worked on matting my photo. Now, I love layers so I was sure to add a few sheets of patterned paper from the 6x6 paper pad plus any "scraps" I had already cut into for previous layouts. Lots of lovely paper and colours makes my heart happy! I then popped the photo onto a piece of foam dimension.


I then began my title. Having already completed the "moments" aspect of my title, the next part was easy! I used the word sweet from the Chipboard Titles. I just adore the mix of fonts to create my title.


Now, my favourite part... to build and create the clusters of embellishment around my photo. I took pieces from the Die Cut Ephemera pack, the Vellum Accents and the Chipboard Stickers. I also added some metallic silver thread and created a nest for my Flair Button to sit within.


I thought that my layout needed a bit of anchoring, so, I added a strip, cut at an angle to the bottom of my layout. I also added some embellishment with some ephemera there as well. Lastly, a healthy sprinkling of the Enamel Shapes and some silver Distress Spray. And voila! My layout is complete!

I thank you for stopping by today!
xoLina

Saturday, 17 February 2018

CVS | It's a Wonderful Life

Good Day Friends!
For my layout this week, I'm using the beautifully created More Than Words collection from Cocoa Vanilla Studio, my new fave!
The photo I am documenting today is of my two little meatballs taken this past summer. Both are sitting on a large rock, enjoying their childhood and life!


I chose Sketchbook as my largest layer of background paper. It's absolutely stunning! The I layered Noteworthy and Gossamer on top, smaller and slightly angled. I placed my 5x5 photo that I printed in black and white, in the center. I matted it with papers from the 6x6 paper pad which are perfect for that exact purpose.


I love embellishing with any thing Cocoa Vanilla Studio. Every piece is wonderful and so usable! I used that black and pink tag and surrounded it by florals, leaves, and butterflies. How perfect! Those pieces are found in the Die Cut Ephemera pack.

Next, I did something I have never done before on a layout... I stamped directly onto it! Ahh! A scary thought but I went for it and I'm glad I did! The stamp set is perfect for cards AND layouts! I used Versafine ink in black.
I added a smaller cluster in the top right hand corner using some of the Die Cut Ephemera, Accent Stickers and a wonderful Flair Button. The button is surrounded by metallic silver thread and creates a bit of texture and visible interest.
For my title, I used a mix of alphas. the "wonderful" is from the Chipboard Accent Stickers. Both the others are from my stash. That glittery font I used worked perfectly with the collection.

Lastly, I added some ink splatter with some metallic silver ink spray and called it done!
That's it for today! I hope you enjoyed my layout because I'm glad you stopped by ☺️
Big Hugs,
xoLina

Monday, 5 February 2018

CVS | Cherish These Moments

Hello Dear Scrappy Friends,
I'm excited to share with you my first creation using More Than Words from Cocoa Vanilla Studio! I am smitten with this collection. Every time I fall in love with a collection and claim it as my favourite, Zoe comes along and creates another stunner. I mean c'mon, it's sooo pretty!
The photograph I chose to scrapbook is a picture of my husband and myself. Fitting as how the theme this week on the blog is about love. ❤️


For my background, I wanted to create some visual interest so I started with layering some of the beautiful patterned paper sheets including; Precious, Gossamer and Noteworthy. I cut down stripes and adhered them down horizontally onto Radiant, that wonderful white with black dots. Simple and sweet!

Then, I worked on matting and layering papers behind my photo. I kept it simple this time around knowing that there would be a bit extra going on with all the patterned papers I had already used with my background. I printed my photo in black and white because I knew it would work perfectly with the collection. I was meant to be! I like a little lift and dimension on my layouts, so I adhered my photo and matting onto some foam sheet before sticking it onto my background paper.

Next, I worked on my title using the word "cherish" from the Chipboard Words and "Moments" from the Chipboard Accents sheet. For the word "these" I pulled an older alpha from my stash. These are Mini Markets in blue and cream.
  
Next, my favourite... embellishing! I used some of the gorgeous florals from the Die Cut Ephemera pack, a feather and that beautifully quoted tag that reads "Live for the moments you cannot put into words." I continued to embellish using the tiny word stickers that are included on the Sticker Accent sheet. They always manage to convey the message I'm trying to convey. <3


I thank you all for being here today and letting me share my layout with you. I appreciate it!
Have a wonderful weekend!

xoLina

Wednesday, 10 January 2018

Chocolate Chip Pancakes

Hey Guys!
Hope everyone is having a wonderful start to the new year. I know I am!
Today's layout is one that is wayyy overdue. I've had this collection from Paige Evans and Pink Paislee, Turn the Page for months! Like sitting and waiting for me on my desk in plain sight, screaming to be used! So, here I am, sharing a layout created with the collection in all it's splendor!


I began this layout with a cut file from Paper Issues, it's free and you can find it here: https://paperissuesstore.myshopify.com/collections/free-files/products/heart-grid-free-cut-file. I cut it using my Cameo and backed it with that gorgeous rainbow butterfly pattern. I chose that particular sheet because the red's in both the paper and photos most closely matched. The other reds were lighter and didn't fit the over all colour scheme.

As always, I matted my photos with papers from the collection and in this particular instance, I used the handy 6x6 paper pad. It's perfect for matting photos. I then popped my photos on dimensional foam for lift.


I decided to then work on my title. I pulled pieces from the Journaling Spots and gave a home for my title to actually live. I didn't want to put it directly onto the layout. It would just get lost by doing that. For my title I used the Thickers in New Day from the collection and the smaller font is from October Afternoon in Mason Jar.

I then went through the Ephemera pack and chose my favourite pieces to embellish my page. Pulling pieces from the Chipboard sheet and stickers, I created visually pleasing clusters in and around my photo.


To finish my layout, I used some Heidi Swapp Color Shine in Gold and sprinkled some gold lovin' around my page. This layout came together rather quickly and I am super pleased about the way it turned out. It's my new fave!

Thanks so much for stopping by!
xoLina

Friday, 20 October 2017

CVS | Big, Beautiful You

Good Morning Friends!
Lina here today and I'm sharing my very first layout using the incredible Bohemian Dream collection. I must first preface this post with saying that I am absolutely smitten by this collection. Zoe has knocked it outta the park for me with all the tones of purple and florals. Perfect!

The layout I'm sharing is of my littlest meatball at about 9-10 months. She was wearing purple and it matched perfectly with the collection so I went with it.
We were challenged this week to use new product... Done and done! Everything I used is new to me and newly available in the CVS shop. Here's what I created:


I began my layout with a crisp sheet of white card stock and a piece of the gorgeous dark purple diagonal stripe paper called, Dreamer. I mounted it to the top of my white card stock and got to work. I chose papers from the new 6x6 paper pad and started matting my photo which roughly measures 4x4 inches.
Next, I worked on my title because it would need to dry before I could use it. I took the words Beautiful and You from the Chipboard Titles and sprayed them with some ink spray. I chose a dark aqua, vibrant pink and a purple. I sprayed the word pieces and used my heat gun to speed up the drying process. I then set them aside and began working on my embellishments.For the BIG part of my title, I used the word title from the Chipboard Sticker Set. I love the mix of fonts!


I lovingly sifted through the Die Cut Ephemera, admiring every detail and piece and chose some of my favourite that would correspond well with my layout. I also used some of the Vellum Accents for layering. I love the subtle look of them. Using some metallic silver thread, I created a nest of sorts for the Flair Buttons to sit within. I used two Flair on this layout.


Next, taking the tiny word stickers from the Sticker Accent Sheet, I added my favourite sentiments in and around my page. I did this with other stickers around my page as well.


Finally, as a finishing touch, I added some of the Enamel Shapes in the Aqua and the Pink. They are a perfect addition to any layout. They just complete the layout in my opinion. 


Thank you so very much for taking the time to share in my layout. I appreciate all your kindness and love! ❤️ Have a wonderful day!
xoLina

Friday, 6 October 2017

CVS | Love You

Happy Friday Scrappy Family!
Hope you've had a wonderful week!

Today, I'm sharing a layout I created of my little one, face full of ice cream 💛 But, seriously, how could I not snap and scrap a picture. She'll thank me when she's older. LOL!
I used the gorgeous Wild at Heart collection for my layout this week and I'm still wild about it!


Starting off this layout, I knew I wanted to stagger my background papers and create an offset layering effect. So I chose my papers and arranged them in the order you see. I used the Luscious paper as my base, then layered the vellum sheet, Artisan and then finally white card stock to get the look I was offer. I just love this effect!

I matted my photo with some of the papers in the collection including the navy floral vellum and popped it up with some foam sheet for dimension.

Next, I went through the chipboard frames (my fave) and choose 3 that I thought worked best with the colour scheme I was working with. I chose a floral and different sized navy blue ones. I placed the floral and the larger navy frames to the left of the photo and the smaller one to the right. Now I have a visual triangle to work with.


Now, my favourite part... embellishing! I went through the Die Cute Ephemera, Chipboard Stickers and the Accessory Stickers and chose pieces to accent my layout and photo. I kept the embellishing relatively simple this time around. Kinda...😛


From the Wood Veneer package, I chose two words, Love and You and used them for my title. But before adhering them down, I misted them with firstly some White Dylusions Ink Spray, dried it and later added some HSCS in Peacock. After drying, the wood veneers have a great over all texture and colour. They kinda remind me of a galaxy colouring. Navy with specks of white peeking through and sparkle... lots of sparkle. Just look at 'em! 💙


To finish up my embellishing, I used a Flair Button that reads Hello. Before adhering it down, I took some metallic silver thread and just created a simple nest for the flair to sit on. I love the texture it adds to the clusters.

Lastly, I took the Enamel Dots in the lighter Blue and scattered them around my page. Placing them just peeking out from other pieces and some to add direction.
I hope you enjoyed my layout share for the week as much as I adored creating it. Have a wonderful weekend!
xoLina

Friday, 22 September 2017

Nonna's Pizza

Hi Scrappy Gang!
Today, I'm sharing a fun layout I created of my mamma and my oldest meatball making pizza. How cute are they both. This picture was taken the day I got discharged from the hospital after having my Gall Bladder removed. My mom stayed over a couple days so that my girls were taken care of and my husband could be with me.

I'll treasure these kinds of memories forever as they're memories created in pure love. 

The collection I used to create my layout is Fancy Pants', Family and Co. How fitting right?
I just adore all the "homey" aspects of this collection. My fave piece in the collection is the espresso machine die cuts and chipboard found throughout the collection. Being Italian, that was a staple in our household growing up. Now, things have evolved and we all depend on our automatic espresso machines. LOL! I miss the good ol' days!

Here's my layout...
BTW- there's also a process video up for this 😉


Thanks so much for stopping by today, I appreciate all of you!
xoLina


Wednesday, 20 September 2017

CVS | Happy Birthday

Good Morning Crafty Family!
Welcome to the blog today, Lina here! Hi!
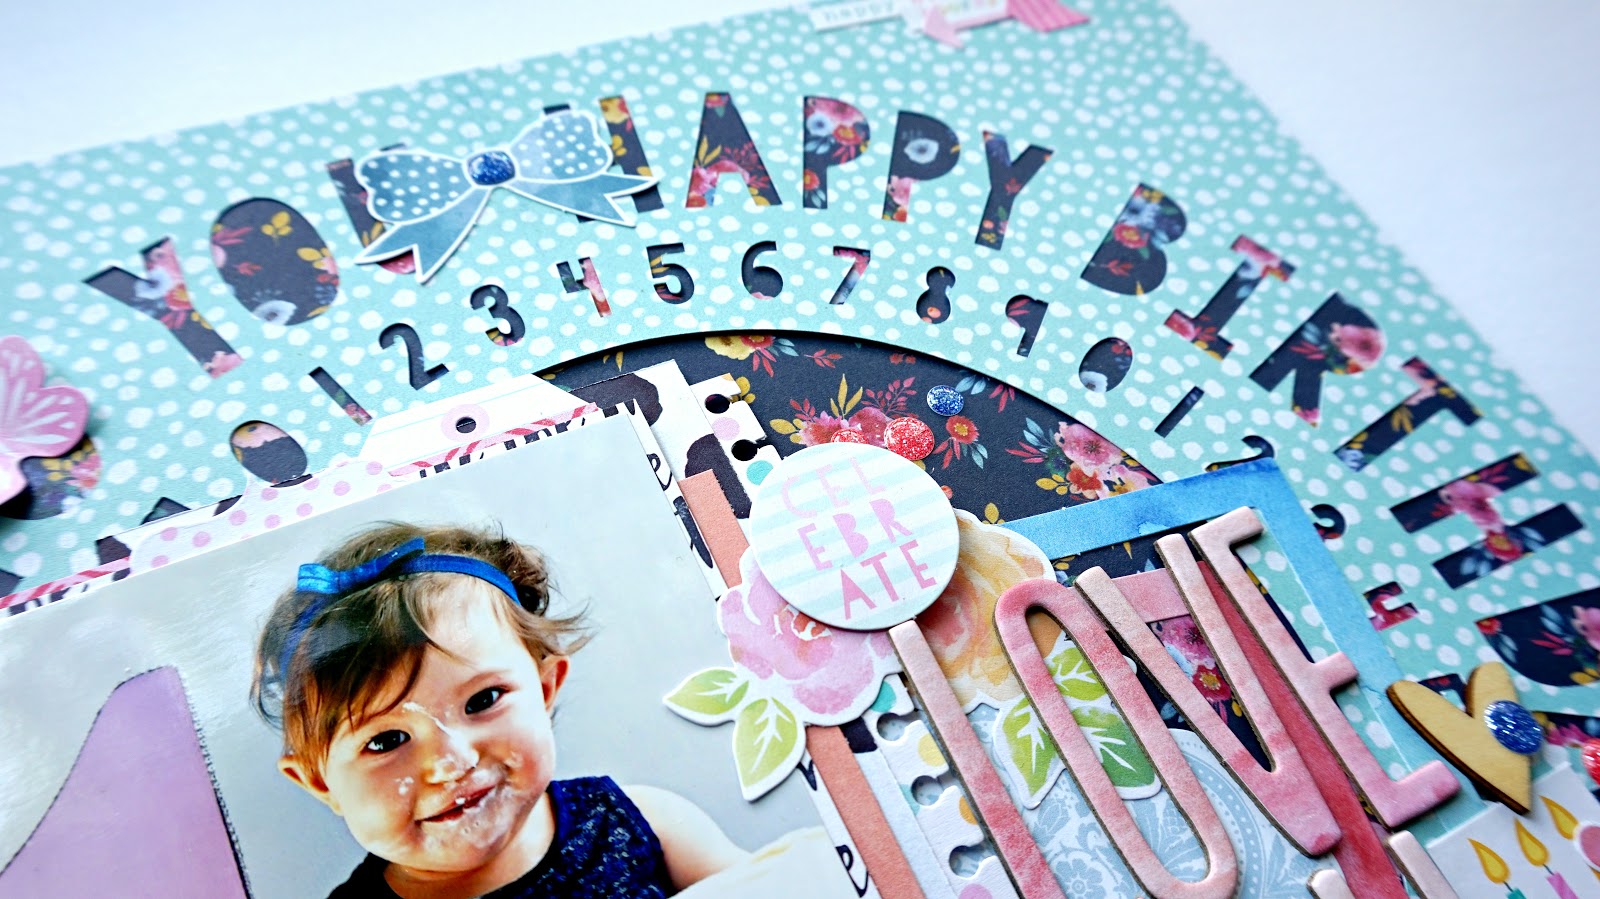
Today I'm sharing a layout I created with the always beautiful Wild at Heart & Make a Wish collections. Yes, I mixed them! They work perfectly together and I love how each are so different but compliment the other so well.
The theme this week in the blog is to use florals and hearts... literally, a piece of cake! LOL!
The photo I chose to scrapbook is of my youngest daughter, on her first birthday. 🎂
Here's my layout...


I started with a cut file from Paper Issues, it's free in their shop and cut it from the aqua Double Dot paper. I then backed it with the navy floral sheet. I just love this pairing! The navy floral really pops behind the aqua dots and it's the first element crossed off the list in this week's theme. Easy!
I began with the matting of my photo using patterns from the collection that I thought worked well with my over all theme. Then, I popped it up onto dimensional foam for added height.


Next, I shopped the Die Cut Ephemera package, my favourite part! I used the ephemera from the Make a Wish collection. I used some very beautiful florals, bunting and pennant banners, words and frames.


Creating a sub title, I used the Love You from the Chipboard Sticker Sheet. The colours were perfect to add here. It gave the layout something with it being a loud and bold title. Next, I also added some very colourful tiny words from the Make a Wish collection. I mean, they were perfect to use here, the sentiments were exact! 


For the "hearts" element, I used hearts from the Wood Veneer package. I left them in their natural state since their colour is so pretty... light and airy. This checked off number 2 of the theme's focus. I added a few other smaller clusters in and around my page. This by no means is a simple or minimalistic layout to be honest, but I love how it came together.

 
This is a good view of how much is actually on this page... All the pattern, colours and embellishment make my papercrafting heart happy! 
Lastly, to add that last little bit of something, I sprinkled around the remaining bit of Sparkle Enamel Dots I had in the navy blue. They are sparkly and pretty and I couldn't resist. I tucked them under elements and around my page. I really love the effect!


Thank you for stopping by today, I'm glad you're here! Hope you enjoyed my layout 💜
Have a wonderful day!


xoLina

Wednesday, 6 September 2017

CVS | Hello Beautiful

Hello Fam,
Today, I'd like to share a layout with you I created using the incredible You Rock collection. This one is still one of my faves! I'm determined to use every last it of it. I mean, how could you not want to! 😉
The photo I am scrapbooking is of my eldest daughter, Ali. She was just sitting on the living room floor, in a tutu, playing with her Hatchimal. I asked her to smile and I snapped this photo. I just love her innocence and her happiness just shines through.


I began with the gorgeous dark blue sheet called Starshine and cut 1 inch off from 2 sides. Then I layered it onto This Way, the aqua arrowed paper. This gave me a 1/2 inch border on all sides.
I knew I wanted my photo to sit on the bottom right of my layout so I decided to create a "shelf" for my photo to sit on. I used strips from the cut apart border sheet. They were perfect for this part.


Because my layout is bottom heavy, I felt it needed balance at the top, so I created a large cluster in the top right corner using pieces of ephemera such as the woodgrain film strip and some stickers from the Sticker Element Sheet. When creating the star pennant banner, I popped up the center one to give the entire cluster some dimension.


I painted the stars from the wood veneer package to match my daughter's aqua tutu. They turned out just the right shade after using some Heidi Swapp Colour Shine in Mint and some Turquoise Dylusions ink. I affixed those around my page along with some orange chipboard stars.
For those who know me, the tiny words are my favourite way to add sentiment or journaling to a layout without having to actually put pen to paper. I picked my faves from the collection and went to town, adding some near my photo and some in the top corner cluster.


I just adore how some of the star veneer are inlayed. The details are incredible. I added a doily behind my photo to give the entire layout a softer more feminine feel. I feel it was a good way to add it without it being overly girly.


I used a Rubber Charm to add a pop of orange in the bottom left hand corner and adorned my page with the Enamel Shapes for more of the gorgeous colour in and around my page. I felt they were a perfect way to sprinkle some love around.


I hope you all enjoyed my layout today. I'm having a lot of fun using this collection for non traditional boy layouts. Thank you for stopping by. See you soon!
xoLina 

Sunday, 6 August 2017

CVS | Hello Sunshine

Hello Everyone,
Lina here today sharing a project I created using You Rock. I'm having so much fun working with this new collection. It's so bright and colourful and because it's Summer here in Canada, it's perfect to use for the season!
Also, I used a bunch (almost all 😜) of the new Summer Cut Files available on the website. You can find them here :  http://cocoavanilla.com.au/shop/summer-freebie-cut-files/

I'm scrapbooking a photo from last week of my parents and my littles at the park. They're all swinging on the swings and this shot captures so much happiness... I'm not sure who's having more fun, the kids or the grandparents 😊


First, I cut the FREE cut files I mentioned above out of some of the patterned paper in the collection. I felt it appropriate to use the yellow pattern for the words Hello Sunshine. Then I cut it a second time in another pattern paper and cut the sunshine piece off using a pair of scissors. I glued them on top of one another, slightly offset, creating a "shadow". I love the effect this gives.

Next, my fave... matting my photo. I used so many pieces from the collection including scraps from papers I had already cut into. After adding a few layers, I popped all of it on some foam sheet for dimension. I just adore the way a bit of lift gives the photo a lot of depth.


Next, I dug into the Die Cut Ephemera and looked for pieces that I thought went well with the layout and colour scheme that I was going for. I decided to make the teal/aqua pieces the focal colour and so I put aside all those pieces as I was searching. I used pieces from the Accessory Stickers sheet, including the little words and phrases to embellish my page and clusters.


Behind the photo and matting as well as behind the Flair Button I used, you'll see some tangled and messy thread. I just love the look of some peaking through.
I finished off the layout with a heathy sprinkling of Enamel Shapes in aqua and yellow to make the layout more cohesive as a whole.


That's it for me today my friends! I hope you enjoyed my layout and my process. I appreciate you stopping by! Have a wonderful day!
xoLina