Showing posts with label Cards. Show all posts

Tuesday, 6 June 2017

CVS | Awesome Shaker Cards

Hey Friends! Welcome to the blog today!
I'm super excited to share something a little different with you. Something a little different then the layouts I make. From time to time, I like to create cards and that's what I've got to share with you today. I've been on a shaker card making kick lately and this collection, You Rock, is perfect for those masculine birthday cards.
I've made two so far, and I want so badly to make more. They're fun! I need to carve out more time to create cards. After all, they're always in demand as it's always someone's birthday! LOL! So, here's what I created...


Both cards measure 4.25 x 5.5 inches, one is landscape and one is portrait. First thing I did was create frames with dies for both. I used one that had a stitched detail. Then I cut some transparencies to fit the frame. To build up my frame, I used three sheets of foam each. I knew I needed some extra space in the shakers to accommodate the thicker pieces of embellishments I wanted to use to decorate the inside of the cards. I allowed everything to dry overnight so there weren't any sticky bits the sequins would stick to later.
 

 I choose background papers that wouldn't complete with all the fun shaker bits and embellishments I wanted to add, so I chose papers that were muted in design. Nothing overpowering in terms of colours or prints.

 To embellish, and add the sentiment I wanted to convey, I used the wood veneer pieces that I heat embossed a couple weeks ago. I used embossing powders in both black and pearl orange. Next, I selected pieces from the Die Cut Ephemera package.
I also used pieces from the Rubber Charms. The fit perfectly in the window since I had given myself enough space with the foam.
My cards *needed* that something else, So I liberally used the Enamel Shapes to add that punch of colour and design.


Now, for the fun part... the sequins! I wanted it to be a super festive card so I went to town with the sequins. I picked colours that screamed PARTY!!! Using colours that are already in the collection, I chose some Aquas, oranges, yellows, metallics and blues. I also added some small beads for another type of dimension and texture. I like the look of all these fun elements together!


Here you can see all the dimension both of the foam creating the actual shaker and the contents on the inside. I could stare at all the pretties all day!

I kept the inside super simple... I matted the inside with some patterned paper from the collection topped with some white card stock to write my sentiments. And that's it! The outside already has so much going on, I didn't want to add (or take away from) to the fun element of the card.

And, that's it! These cards took a little longer to create because of all the extra steps involved, but they are soooo worth it! I can't wait to see the faces of the recipients when they open their cards!

Thanks for stopping by today! Have an amazingly, creative day! xoLina ❤️

Wednesday, 10 June 2015

Card Process: Celebrate 80

Hey Friends,

Today's share is a bit different as I created a card for my grandmother's 80th birthday. I usually don't share the cards I create, but today I turned on my camera and thought... "What the heck! Let's give this a try!" LOL!

The card base itself measure 5 1/4 '' square.
I embellished the card front with Crate Paper's Close Knit Collection. It was perfect!
I also used a yellow doily and some Heidi Swapp Color Shine in gold.

Hope you like it!


Thursday, 9 October 2014

Mixed Media Card: Love Deeply

Hey Friends!
Today, I decided to try my hand at something different... Mixed Media. I've always been interested in it but never knew how to, let's say... do it! Finally, I just decided to jump in and take it on head on. Let me tell you, once you get over the fear of doing it wrong, it's loads of fun!

This card did not take me long at all. It actually reminded me of when I used to make dimensional cards, kind of altering items. Totally fun!

I wanted this card to be super sturdy so I started off with a black chip board base. Then I went to town.... I adhered paper first as my base and then added some Liquitex Modeling Paste with a damask stencil from Prima. It dried pretty quickly. I'd say about 5 minutes after I gave it a shot with my heat tool for about 30 seconds. Then, I layered other papers and embellishments such as mulberry flowers, a metal time piece, seam binding and some jute twine.

After I got the paper pieces and die cuts where I wanted them, I went in with some more modeling paste and painted it on certain areas. Once that was dry, I went in with some paint in a dark teal, yellow and royal blue and gave the card character. I spritzed the flowers with some Lindy's Stamp Gang spray in Scintillating Silver. I could not get a good picture of the shimmer to save my life. But trust me, it's so pretty and shimmery. 


Lastly, I made a custom envelope box for my card. I needed to, it's so very dimensional and there was no way it was fitting into a standard envelope. I love the look of it!

So happy with how this card turned out. I foresee me making tons in my very near future!

Thanks for stopping by!


Wednesday, 1 October 2014

I Heart You Card(s)

Happy October Friends!

Today, I'm sharing a card with you. I just {heart} them! Haha! Don't mind the pun! I'm a comedian today! ;)

The image is from Some Odd Girl and her name is I Heart You Gwen. She's adorbs and I knew she had to be front and center on my cards. She's all coloured up with Copic markers. I'm really LOVING colouring red-heads right now. The picture is not doing the colouring any justice. It's a shame. I've struggled so much with my camera today... I give up! This is the best it's going to get today and I don't want to wait another day to post this project.... So, voila, here she is!

The cards bases themselves are made with some plain coloured cardstock. I think I used some Recollections and Bazzill. The Polaroid frame came in a pack from Recollections. I've had these in my stash for a longgg while and am now just busting them out.

The sentiment is something I just created on my computer in a word document. Very simple.

The die cut embellishments (I think) are from Kaiser Craft. Luckily the pack came with several doily shapes so I was able to use them on both cards. I added some enamel dots in some areas and finally added some rhinestones to add some sparkle. Gwen has got rhinestones for earrings and in the center of the doilies on card two.

Hope you all enjoyed what I had to show today! Have a wonderful day!


Tuesday, 16 September 2014

Happy Birthday Shaker Card

Hi Friends!
I have something other than a layout to share today! Haha!
Over the weekend, I had the luxury of sitting down in my craft room and actually creating. Shocker, I know ;P
I've been meaning to create a shaker card for the longest time but just couldn't find the time with a teething 10 month old who refuses to nap. But, this weekend, the craft gods smiled upon me and VOILA, a card was born! Haha! OK, so truth is hubs was home and watched monkey... same thing! ;)

I had this imaged already coloured up from Some Odd Girl. This pretty is Alice Mae and I just adore her. She's adhered down with lots of foam dimensionals.
I started off with a card base which I created from a 12x12 sheet of Bazzill cardstock in an aqua colour, cut down to size. This card here measures 5 1/4 inches squared.
The paper collection I used for this card is the Authentique Renew Collection. Love all the aqua and yellow, black and white!

Next, using Lifestyle Crafts Circle Dies, I cut the circles and created the "shaker" part of the card. I added a cute cluster of balloon die cuts propped on foam adhesive and all the sequins.You can see by the second photo below how dimensional the card really is. Next, to embellish, I used some Pebbles Inc die cuts. I don't know the name of this collection but it's chalk full of celebration and party pieces. Love this!

Thanks for stopping by today! I appreciate you all!


Monday, 28 April 2014

Lots of Happy Birthday Cards

Happy Monday Y'All!
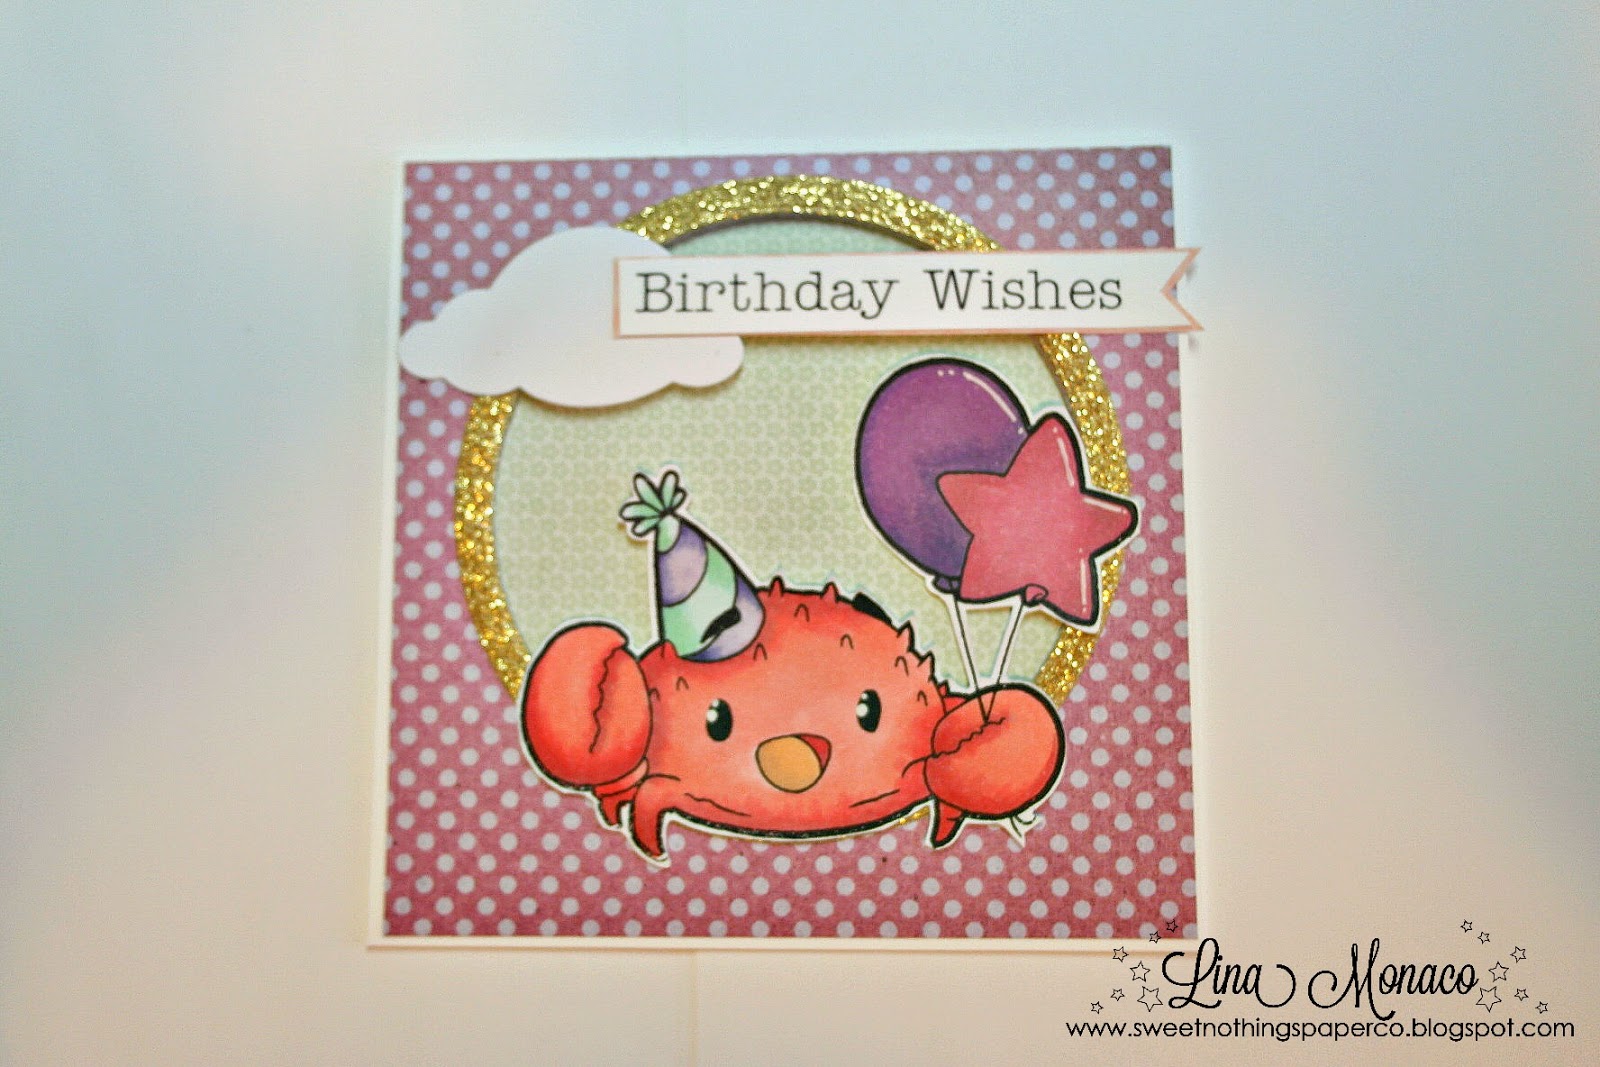
Ok, so I went a little crab crazy Friday evening and busted out a number of birthday cards. basically, I stocked my inventory. LOL! Hope everyone loves this little critter as much as I do! They'll be seeing it A LOT! LOL!

The image is from Some Odd Girl and it's a digital image, Party Crab. All the images are coloured up using my Copic markers and accented with my absolute fave white gel pen, Uniball Signo Broad.

I mixed and matched paper collections here. I must have used sheets from about 6 different 6x6 paper pads. Using circle dies and glitter cardstock, I created cute accenting frames for them. Just love this little bit of glitter on a card. I think it finishes it off beautifully. 

On some of the cards I used LOTS of dimensional foam to really make the images pop. You can see how thick I applied it in the second picture.

Thanks for stopping by. Have a good one :)


Tuesday, 22 April 2014

Happy Birthday Card

Happy Tuesday Kiddos,

I've got yet another card for you all today. 
The paper collection I used is from KI Memories and it's the Metro Garden Collection. It's a little 6x6 pad I got from a special friend in a RAK. I really liked the subdued colour palette and modern prints and had to use it. Sadly, I got it months and months ago and didn't have a chance to use it because I was so busy with the new baby. But, I got to it! LOL!

The image itself is another digital image from Some Odd Girl, it's the Splendid Soiree. This is a super fun image for birthdays and celebrations. i just love that there are 3 pretties in the picture and not just one :)

I used some twine as the balloon strings and gave them all rhinestone earrings. The image and the banner are popped up on foam squares to give it just a bit more fun and dimension.


Ordinarily, I am a jump off the page colour kinda girl but I'm adoring the way this card turned out and my choice of papers. Hope you all like what I created :)

Monday, 21 April 2014

Sending Love Card

Hey Friends,
I want to share with you today a card I created. I challenged myself to only use scraps I had. No cutting any "new" sheets of paper for this card. I have so many scraps of beautiful paper (that I have a REALLY hard time throwing out) in my scrap drawer that I just couldn't bare to not use them. So, here it is...

The image itself is a digi from Some Odd Girl, Red Riding Hood. I just love her! I love all their stamps quite honestly. And, a week or so ago, I colored up a few images while munchkin was napping. So, I had her ready to be placed on a card. Yay!

The paper lines used elude me at this moment but it's not important since they're scraps and that's what my challenge was about. I challenge all of you to do the same. I'd love to see what you come up with :)

I Glossy Accented all the hearts, gave this cutie a rhinestone earring and popped a lot of this card up to give it a ton of dimension. A few MS Leaf die cuts and my card was complete.


Thanks for stopping by!

Monday, 16 December 2013

Happy Birthday Card

Hey Friends!
Today (after a long while... I know), I want to share a card I created for my sweet sister's birthday. She'll get the card on Saturday so hopefully she doesn't read this before then :P

So... I've discovered something. What, you ask? I {heart} Some Odd Girl! Oh my! Such cuteness! The company itself offers both clear stamps and digital images. I took advantage of the black Friday Sale in which they had 40% off their digis. Score!

I created this card with the Spectacular Soiree digi from SOG and coloured it up with my Copics. After colouring it all up and fussy cutting it out, I added a touch of glitter to certain parts of the image (shoes, balloons and party hats) with my clear At You spica pen. Then, I popped up the image with foam adhesive and stuck it into the middle panel. All three panels, including the front, are covered in the same paper as mentioned below.

The paper line I used was from Crate Paper and Maggie Holmes. The card base is created from run of the mill Recollections cardstock. I scored and folded it into an elevated gate-fold so it would accommodate the popping up of the image I had in my head. Worked like a charm. And added a belly band.

Finally, I added some clear rhinestones and called it done!
I'll write the message to my sissy on the far left panel... it's the perfect space for it!

Hope you all enjoyed my post and card today. I had a fun time getting back into my craft room and actually making something!
Big hugs!


Wednesday, 8 May 2013

Cookie Sophie Macaron Box


Morning Friends!
 
Happy Friday to you all!
Today I wanted to share my project I created for Sweet Nothings Stamp Co. It's a macaron box.  I didn't have any macarons on hand so I opted for an equally delicious alternative, cookies. Seems fitting enough right?
I used Cookie Sophie and coloured her up with my copic markers. She's cut out and popped up on dimensionals to give her height. I used many different paper collections and die cuts I thought worked together well and gave me the colour scheme I was looking for. Some is Crate Paper, MME, Dear Lizzy American Crafts and a cute little cameo die cut. The alpha's I used are October Afternoon stickers in the most perect pink sorbet colour.


I hope you all enjoyed what I had to share with you today and you'll check back here soon to see what's new :)
Have a great weekend!!
xo


Thursday, 2 May 2013

Character Focus: Handyman Lucky

Hiya!
Hope you guys are all well and enjoying the beautiful Spring weather! I know I am. It's nice not to have to wear coats and sweaters anymore! LOL!

Today, I want to share with you my Character Focus project for Sweet Nothings Stamp Co. This month we're using Handyman Lucky! Just love him! And, it's a great time too since Father's day will be hear in a flash! It'll be nice for once to be ahead of the game and ready! Haha!

Here's my card:

Hope Y'All enjoyed it and will head over tot he SNSC blog and see what else the DT has created to inspire you!
Talk soon!

Friday, 19 April 2013

SNSC 1 Year Celebration Blog Hop

 
Hello Hoppers!
Welcome to Sweet Nothings Stamp Co.’s  1 Year Anniversary Celebration Blog Hop! We’re so excited you’re here!
This year quickly flew by and we can’t believe we already have a year’s experience under our belt! Boy, does time fly when you’re having fun! We hope our next years are as fun and this past year has been.

This is the project that I've created for the blog hop. I hope you enjoy it as much as I enjoyed creating it!


My card for the hop is a little different... I challenged myself to use embellishments and papers I already had out. Things I hadn't had a chance to put away yet and were waiting ever so patiently to be used again. It's a mish mash of different paper companies including Prima and MME. The cardstock and card base is just some Bazzil cardstock.

The digi image I used is Balloon Sophie. I thought it was fitting considering we're celebrating SNSC's first year birthday! I coloured her up using my Copic markers and gave Sophie some pink pearl earrings. The special touch she needed ;)
The rest of the embellishments are some chipboard pieces, diecuts and a doily. I think it all works together well considering the lines are all different. it's sort of a shabby chic-ish mash up! LOL!

So, without further adieu, here is the list of designers contributing to our fun little blog hop; This is the line up...
If you get lost or just stumbled upon this post, please start from the beginning of the line-up.
 

To celebrate, we’ve got some fun in store for all of you... Be sure to hop along to ALL of our DT and GDT member’s blogs and be sure to leave a comment on every blog in order to qualify for a prize. Hoppers will have until midnight of the 22nd to comment. Winners will be chosen at random and announced on the 23rd on the SNSC blog.
All prizes were graciously donated by our fabulous sponsors. Be sure to show them some love as well and stop by their shops :)
** Please remember to leave your email address in your comments. This way, we can contact you if you win :)

MB's Treasurista- A $35 gift certificate from MB’s Treasurista to use in their shop http://mbtreasurista.com/
 
Karlas001- x2 Prize packages of laces and trims from Karlas001. Each prize pack’s value is $25. 
http://www.etsy.com/shop/karlas001 

Diana McRae- A mixed piece (50) prize pack of wood veneers 
PLUS a $10 gift certificate to use in her shop. Total prize pack value is $35.00.
www.Photobucket.com/WoodVeneers


Lavish Laces- A mixed prize pack of laces, trims and flowers. Prize pack value is $40.

 
The Piece by Piece- A mixed prize pack of laces and trims. Prize pack value is $40.
www.etsy.com/shop/thepiecebypiece 

 
Sweet Nothings Stamp Co.- 3x Prizes of 3 digital images. Winners will be able to choose which images they’d like to receive. 
www.sweetnothingsstampco.com

Thank you so much to all of you who have supported us through our first year! We owe our success to all of you! We hope you’ll continue to support us and grow along with us! 
Thanks for hopping along with us!

xo Lina & The Sweet Nothings Stamp Co. Team <3

Tuesday, 5 February 2013

Valentine's Day Tag

Happy, happy day to you all!

Today's project is a Valentine's Day tag I created using one of the newest releases from Sweet Nothings Stamp Co. I used Cupcake Sophie and I just LOVE her! Everything from how she's sitting on the cupcake, the heart cherry and her ringlets. She's just too cute for words. She is coloured up using my Copic markers.

The tag I used is just a simple, white shipping tag which I covered with paper. The paper collection I used is the new Love Letters from Bo Bunny. It's such a pretty paper stack. I did quite a bit of "popping up" on the tag. I just really wanted dimension without the bulkiness. In the background, you'll notice a doily I adhered and cut down to size. The trim I used, I believe, is from Making Memories and just fit perfectly with the colour scheme of the papers I chose. 

Hope you like it! Have a wonderful week!

Thursday, 24 January 2013

Get Well Soon

Hello my Sweets!

First off... Bbrrrr... it's been cold lately! I don't know about you guys but I am ready for the spring already! LOL!

Today's project is a get well soon card featuring Sleepy Time Sophie from
Sweet Nothings Stamp Co.! This digital image is totally on my list of favourites. She's too cute for words with her pj's and teddy bear! Sigh!

Sophie is coloured up using my Copic markers and I accented the buttons on her outfit with teeny tiny pearls making them look more like buttons. the paper collection I used is from MME The Sweetest thing- Honey. 
I did a ton of paper layering on this card but surprisingly enough, the card itself is not overly bulky. The mulberry flowers of course make the card a bit more dimensional.

I hope you like what I have created this month and you'll head over to the 
SHOP to check out the available images. Create your own piece and send it over to us... We'd love to see what you create and Sophie in action!

Have a great day!
xoLina


Thursday, 20 September 2012

Last Ode to Summer :(

Good Morning Bloggers!
I think it's safe to say that Summer is finally (and regrettably) over! I'm not going to lie, but I am kinda glad... Autumn is my favourite time of the year. I love the changing leaves, the cooler weather, the smell and scent of fall... basically everything!

But, to say farewell to summer, I decided to create one last and final card using Ice Cream Cone Sophie. She is too cute and one of my favourite digis for sure. I had to fit her in somehow. You can find here here in the
shop from Sweet Nothings Stamp Co.
I used the Neapolitan paper collection from AC, a perfect fit. The ice cream cones in the collection match Sophie's sweet treat to a T! It was a no brainer :)


I did a lot of layering using various bits and pieces. I used some twine and some rosette trim as I thought the colours fit well with the overall colour scheme of the card.
 
It's hard to tell in the photo, but I added some Stickles to her ice cream and the larger ice cream on the left. I wanted to give it all a little something something :)

I hope you all enjoyed this last tiny piece of summer! I know I sure needed it! LOL!

Thursday, 6 September 2012

Acetate Butterfly Card

Hey Guys!

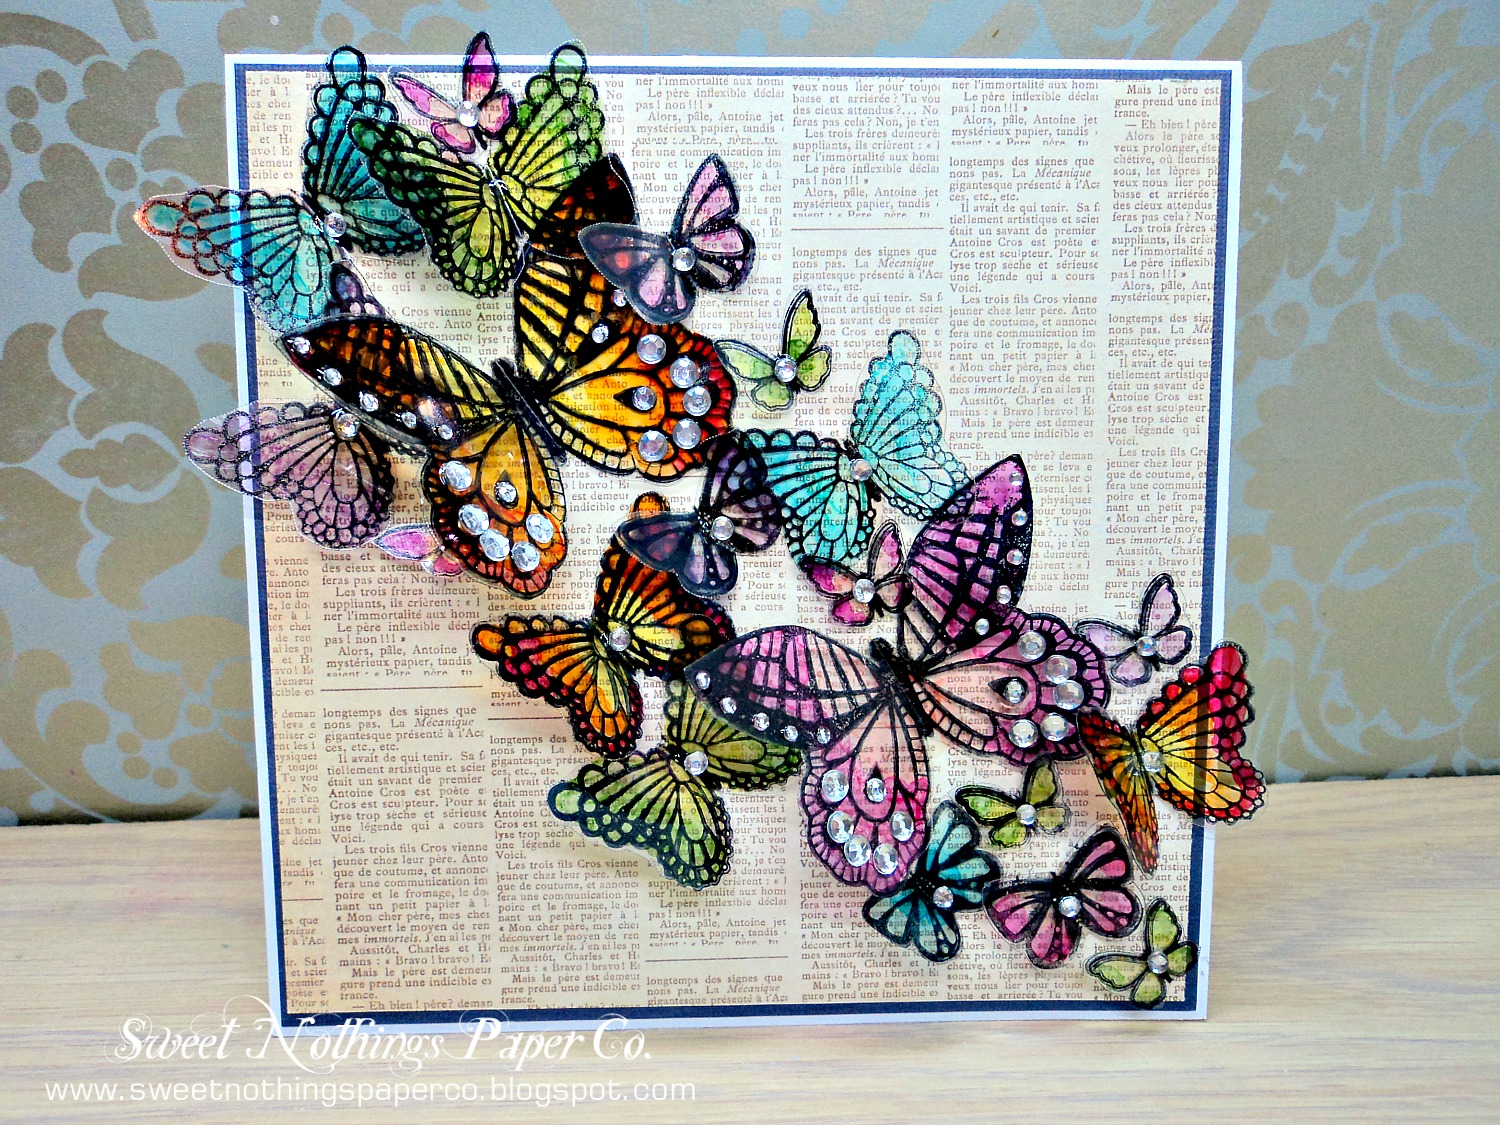
Long time no post huh? Well, my surgery went well and I'm starting to feel a bit better and so I thought I'd share this card I created quite a while back.

I am in love with the look of this card! It's super simple and not overly done but it's perfectly elegant. Well, I think it is! LOL!

All I did was stamp some butterfly images onto acetate with my black Stazon ink, flipped the acetate around so I wouldn't be colouring directly onto the ink and ruin my Copics and went to town using Copic markers. You can use any kind of alcohol based markers for this. When I was done colouring, I cut out the butterflies and arranged them on my card using my Tombow Mono to adhere them. I only glued them in the center and left their wings unglued so I could fold up the wings and make it look like they were in flight. It makes the card pretty dimensional but the overall effect is so much nicer, I think. I lastly added some rhinestones to the bodies and wings of the butterflies for some added visual interest. And, that's it! Easy as pie!
Hope you all enjoy!


Thanks for stopping by!